Keyboard Video Mouse switch & volume control
- Marcus Wu
- Engineering , Software , 3 dprinting , Electronics
- May 6, 2024
The Problem
I have frequently owned more than one computer. Switching between working on them can be a hassle. I could go the multiple monitor, keyboard and mice option and probably need multiple desks, or I could go with one keyboard, mouse, and monitor which is ideal for me (not to mention cheaper).
Connecting one mouse, keyboard, and monitor to multiple computers is a problem that has been solved before. Despite my interest in making and building just about anything and everything, I tend to opt for pre-built solutions when I don’t have reason to need more than what they offer. That leaves me with more time and effort left for other projects.
One such pre-built solution for this problem is a KVM switch. However, there are a couple of problems with KVM switches:
- They typically support one type of monitor connection (HDMI or DP)
- They often limit resolution or refresh rate
- If EDID emulation is not supported, keyboard and mouse will disconnect and reconnect to the computer when switching
- They can be somewhat expensive when supporting the features above
Those features can be particularly important if one of the computers is used for gaming.
Initial Pass
My initial project utilized a fork of deej . I used some faders, a USB switch, and an Adafruit ItsyBitsy to handle deej volume control and detecting when the USB switch was toggled.

The button at the top was connected both to the USB switch and the ItsyBitsy. Pressing it would toggle the USB switch and send a serial message to deej which would send DDC commands to the monitor to change input sources.
This project solved my issues by:
- Using a USB switch to swap peripherals between computers
- Using local code on each computer to send DDC commands to the monitor to swap input sources
- Additionally, I was able to build in a simple mixer to connect a single pair of headphones to both computers (the round empty spot at the top was where the headphone jack was).
Because there was nothing between the monitor and each computer, I do not have to worry about resolution or refresh rate limitations. I also get the added benefit of per-app volume control that deej provides.
The mouse and keyboard will disconnect and reconnect with the USB switch similar to a KVM switch without EDID emulation, but that isn’t as big of a concern for me.
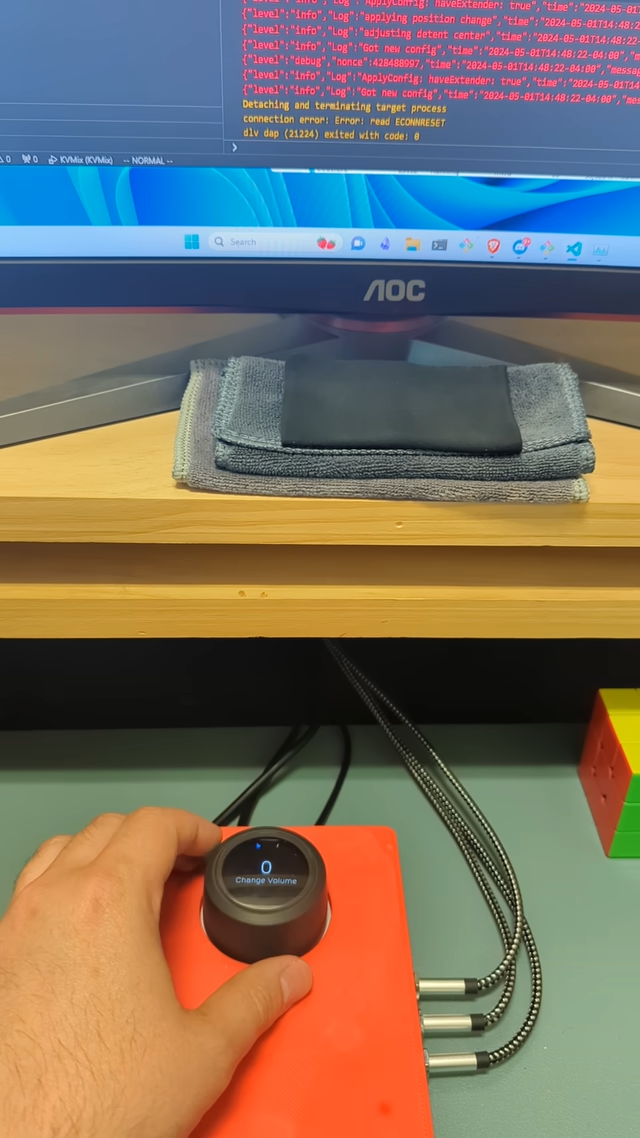
Utilizing a SmartKnob
After completing this project, I discovered the SmartKnob project by Scott Bezek . Immediately, I saw the potential to utilize this knob for both volume control and switching computers so I set about building one.
The SmartKnob was very difficult for me to build. Most of it was not too difficult. Sourcing parts from the BoM is familiar to anyone that has built open source hardware projects such as 3D printers. Soldering was not new to me either, but soldering such tiny surface mount components as there are on the SmartKnob was. I initially used an electric hotplate designed for cooking to solder the components. I highly recommend a hotplate designed for soldering. They are built with thermostates that help ensure the proper heat curves are followed. I also highly recommend ordering more components than you need in case one gets burned out.
After many attempts I finally got everything worked fine except for the motor driver which is a QFN package chip that has all its pins under the chip. The small component kept having bridges between the pins under the chip. It took a bit of trial and error to finally get it right. One of the attempts involved trying to avoid desoldering components from the back of the board which ended badly.

Next, I needed a way to toggle the USB switch from the SmartKnob. It needed to function basically in reverse to the previous project. Instead of the microcontroller detecting when the USB switch is toggled, I wanted to toggle the USB switch from the microcontroller. To accomodate that, I needed a way to connect the SmartKnob to the USB switch. Initially I had planned on using one of the unused pins on the SmartKnob microcontroller. However, it turned out that the only unused pins were input-only pins. To control the USB switch I needed output. To get more pins, I used a GPIO extender . It communicates over I2C which the SmartKnob already uses for communciating with its light sensor so all I just needed to add this chip to the existing I2C bus on the SmartKnob.
Toggling the USB switch from one of the GPIO extender’s pins proved to require a little bit more work. The USB switch toggled via a button. One end of that button was a microcontroller pin and the other end was 5v. The SmartKnob microcontroller works on 3.3v and directly attempting to connect that circuit would overload the SmartKnob. To do this, I needed a transistor to amplify the signal from the SmartKnob’s 3.3v circuit to the 5v that the USB switch needed. Here is the resulting circuit diagram:

Driving the Hardware
After having built the hardware and verified its functionality, I needed to build the software to make it work. The SmartKnob firmware utilizes protobuf to communicate over USB’s serial bus. I forked the firmware and added a field to be able to tell the hardware to change an extra microcontroller pin to high or low – functionality I needed to be able to toggle the USB switch between computers.
After that, I needed some software on the computer side to send the SmartKnob configuration for the screen and haptic feedback. The SmartKnob project provides libraries in TypeScript and Python to communicate with the SmartKnob, but I have become fond of Go so I decided to write a port of that library called gosmartknob . The main branch works with the normal SmartKnob protobuf protocol while the kvmix_changes branch contains the updated protocol with the changes I needed for KVMIx.
The KVMIx Application
Finally, I had everything I needed to write KVMix , a utility to handle the DDC monitor input source changes and volume control on each computer. Initially, this project only supports OSX and Windows, but Linux support is possible and I may add it in the future. DDC control was a challenge on OSX because it needs to work differently based on whether the Mac is running on Intel or Apple architecture.
The SmartKnob itself can be considered a UI similar to a web page or mobile app, so I decided to build KVMix utilizing a react-like unidirectional data flow pattern. Events from the UI trigger viewmodels to update state. Updated state is sent to the smartknob via the protobuf protocol and result in UI updates to the SmartKnob.
Publishing
Sadly, the USB switch I used is no longer available making all of the 3D printing useless to others. The electronics might also need to change for a different USB switch.
I have other projects to work on right now, but at some point I will revisit this project and update the design for use with an USB switch that is available so that others can duplicate my work. This will probably happen after I find my next opportunity.